Custom Domain for Jekyll
Give your Jekyll site a professional touch with a custom domain
Setting up a custom domain name for your Jekyll website is a simple way to give a more professional and polished look. Instead of a generic address like synvan.github.io, you can switch to something cleaner like synvan.com or synvan.io. In this post, we’ll go through how to set up a custom domain, step by step.
Domain Names & DNS Intro
A domain name is a human-friendly address used to access websites and email services on the internet, acting as a user-friendly alias for the more complex numerical IP address. For example, instead of remembering a series of numbers, you can type google.com to reach Google’s website. It’s essentially your website’s address on the internet, making it easy for people to find you.
A DNS server, or Domain Name System server, is a crucial part of the internet that translates human-readable website names (like google.com) into the numerical IP addresses that computers use to locate and access those websites. It acts as a phonebook for the internet, allowing users to access websites by their domain names instead of needing to remember complex IP addresses. 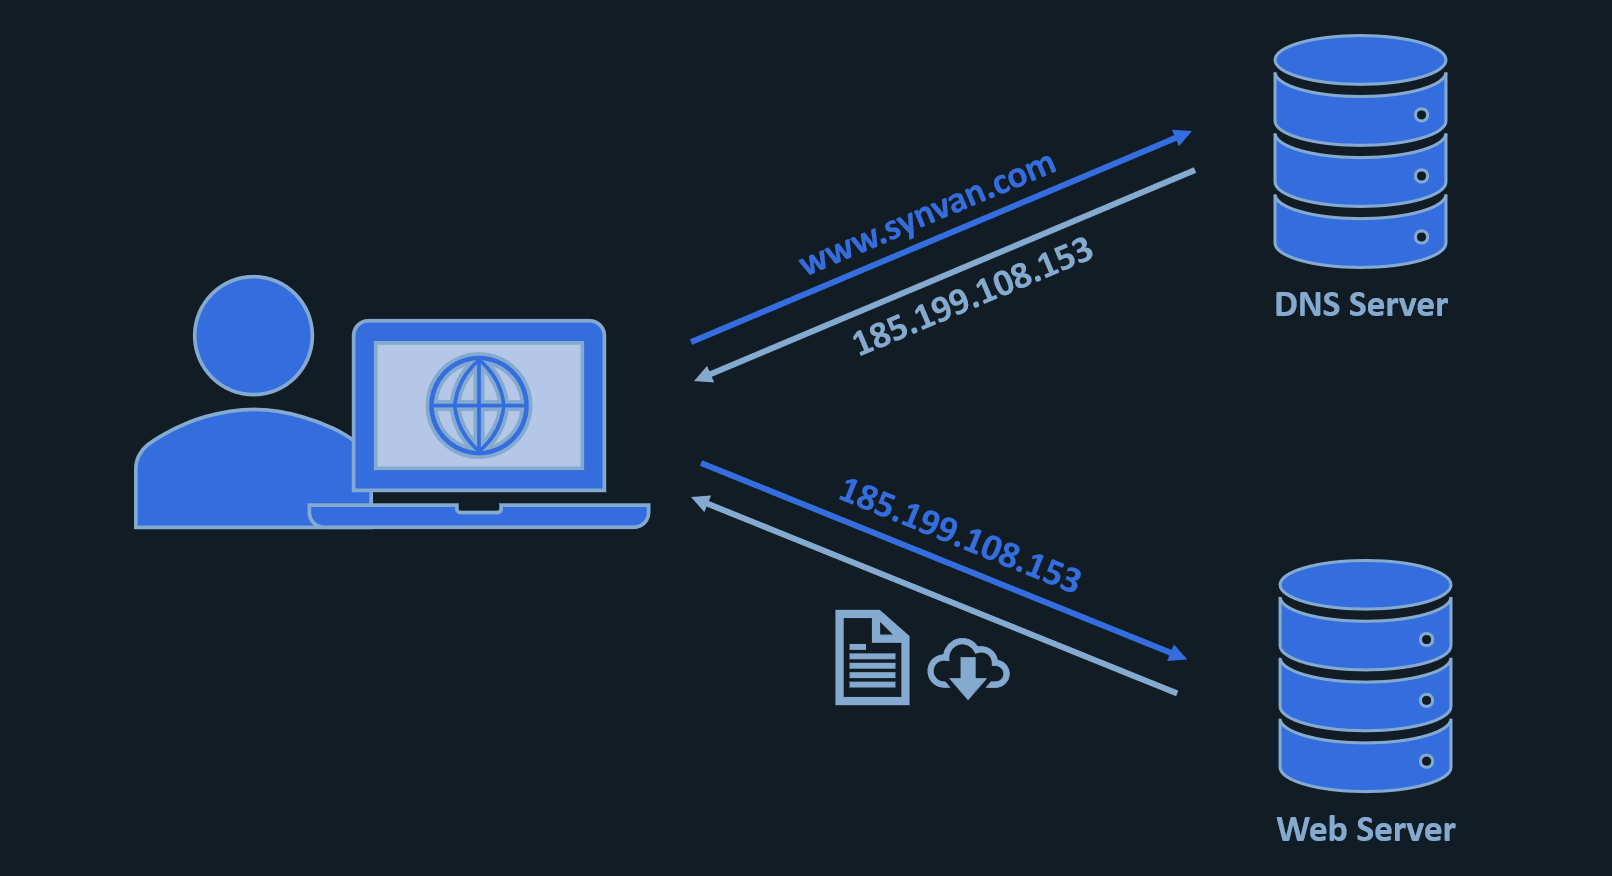
Domain Purchase
First action would be to buy and own a domain. I recommend Cloudflare since it is a reputable internet service provider which basically offers registering domains through them at cost value. Also, it has dark mode!
- Go to Cloudflare and create an account – it’s extremely convenient to simply login with your Google/Apple account (I assume you have at least one of those – one less password to remember).
- Once logged in, navigate to Domain Registration in the left-hand menu, and then slide into the Register Domains sub-menu.
- From here on it’s pretty straightforward – flow with your imagination and check availability and prices for your favorite domain names.
- Purchase the domain name!
Verify Your Domain
Verifying a custom domain with GitHub ensures that only repositories owned by you can publish to that domain (and its subdomains). This protects against domain hijacking, which can occur if a repository is deleted or GitHub Pages is disabled while the domain remains active but unverified. Once verified, the domain and its subdomains are safe from shady actions by other GitHub users.
GitHub Docs already have a super clear and detailed guide on how to verify your domain via your account settings on GitHub.
Here’s how to find the DNS management page on Cloudflare’s dashboard:
- Open your Cloudflare dashboard.
- Navigate to Domain Registration in the left-hand menu, and then slide into Manage Domains.
- Click on
Managein the row of the domain name you just purchased. - In the right-hand
Quick Actionsmenu, click onUpdate DNS configuration.- As instructed on GitHub Docs guide, in Cloudflare’s DNS Records dashboard click on Add record (located to the right of the DNS records search bar).
- Make sure the DNS Record type is set to
TXT. - Record’s
Nameshould be copied from GitHub’s instructions, don’t forget to prefix with your domain name (e.g.,synvan.com). - Record’s
Contentshould be the code value given by GitHub.
Once domain verification is complete it should look like this: 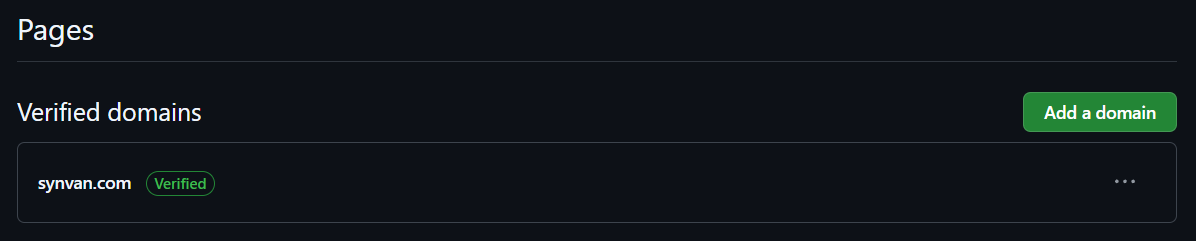
Domain Configuration
Apex domains and subdomains are both parts of a website’s address, but they serve different purposes. An apex domain, also known as a root domain, is the main website address (e.g., synvan.com). A subdomain is an additional part of the address that comes before the apex domain (e.g., blog.synvan.com).
Configuring Apex Domain
I assume you’re keeping it simple and just want to configure an apex (root) domain, GitHub Docs has a great guide with detailed explanations step-by-step. In a nutshell the process can be summarized into two steps:
- GitHub Repository Settings: Plugging in the new custom domain name.
- Domain Management Dashboard: Setting up the DNS records.
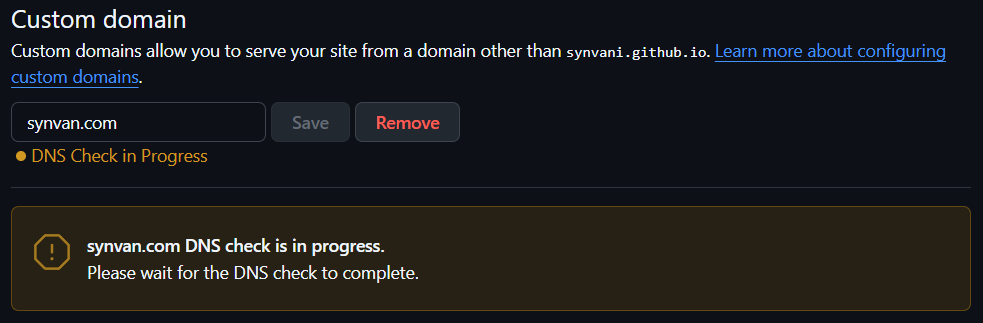
Shortly after typing in your custom domain name and hitting Save, a DNS check by GitHub will be triggered. It will likely fail since you probably did not manage to complete the DNS records setup yet, and even if you did (nice!) – DNS updates sometime take awhile to apply.
DNS Records Recommendation:
- If your DNS provider supports
ALIASorANAMEat the root, go with that as it’s lower maintenance (though Cloudflare does not supportALIAS/ANAMEat this point). - Otherwise, create four
Arecords pointing to GitHub’s IPv4 addresses. - If you want IPv6 support, also add the
AAAArecords GitHub recommends, but keep theArecords due to spotty IPv6 adoption. - Create additional
CNAMErecord pointing fromwwwto<username>.github.io.
DNS Records Breakdown
ARecord:- Function: Maps a domain name (like
synvan.com) to an IPv4 address (like185.199.108.153). - Use Case: Directly points a domain name to the server hosting the website or service.
- Limitations: Only works with IPv4 addresses. Requires an
AAAArecord for IPv6.
- Function: Maps a domain name (like
CNAMERecord:- Function: Maps a domain name to another domain name, essentially creating an alias.
- Use Case: Useful for creating aliases like
www.synvan.compointing tosynvan.comor for pointing to services hosted on other domains. - Limitations: Cannot be used at the root of a domain (apex) like
synvan.com. It also cannot coexist with other records on the same domain name.
ALIAS/ANAMERecord:- Function: Provides a way to point a domain name (including the apex) to another domain name, but internally resolves it to an
AorAAAArecord. - Use Case: Useful for pointing the root domain (e.g.,
synvan.com) to another domain (e.g., a cloud service) while still allowing other records on the same domain. - How it works (simplified): When a DNS server receives a query for an
ALIASrecord, it looks up theAorAAAArecords of the target domain and returns those as the answer, effectively hiding the underlying IP address change from the user. - Availability: Not a standard DNS record type, but offered by some DNS providers.
- Function: Provides a way to point a domain name (including the apex) to another domain name, but internally resolves it to an
Here’s creenshot of my Cloudflare dashboard after plugging in A and AAAA records: 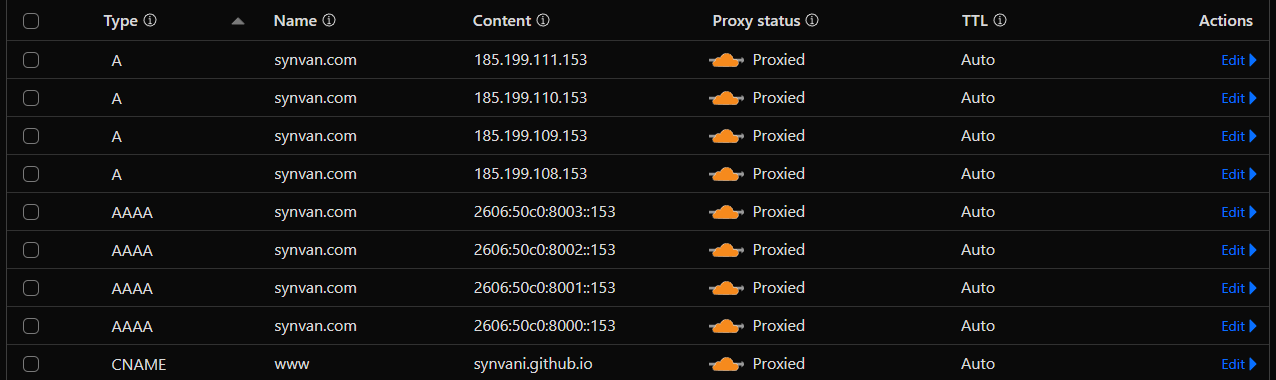
Domain Successfully Applied
After some time you should see a successful DNS check on GitHub repository settings: 
Reminder that DNS record updates typically take between a few minutes and 48 hours to propagate across the internet, though some cases may take up to 72 hours. The exact time depends on various factors, including the Time To Live (TTL) setting for the record, the type of record, and the caching behavior of DNS servers.
You’ve now got a custom domain that makes your Jekyll site feel more like your own space. Just give DNS a little time to kick in!